Sometimes you want to use a second screen, but you don’t have a free second connection or maybe that second device is too far away? No problem, because you can connect the display wirelessly, provided the device is compatible. In this little guide, we show how easy it is to wirelessly connect Windows 11 to an external monitor.
Of course, the guide assumes that both your Windows 11 PC or Windows 11 laptop and the required external display, be it a monitor or perhaps a smart TV, can support this option. If not, Windows 11 will either tell you or it won’t find any when searching for compatible monitors.

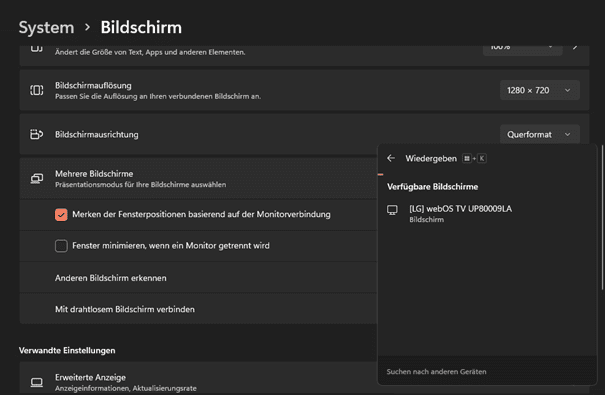
Opens Windows 11 settings, for example via the gear icon in the main menu or via a key combination Windows + I Then switch to the area for Monitor. Here you can then select the sub-element of Multiple screens Unfold upon entry Connect to a wireless screen on the button Connection Click. If there are usable devices, it will be displayed in a list and you just have to click on the desired output device.

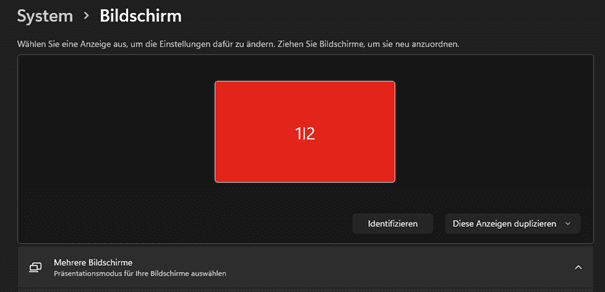
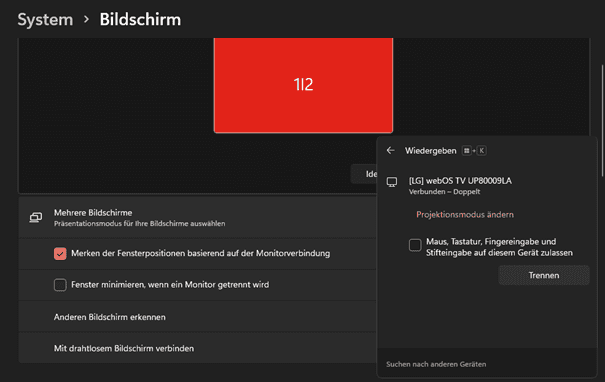
Then, you can also decide how the additional screen will be used, i.e. whether it should be duplicated or extended, or perhaps even used on its own. If you want to stop wireless copying, you can do it very easily via the small bar at the top of the screen and once you remove it by clicking on the pin icon, you can simply search for wireless screens to connect again as shown above and then go from there corresponding button on the screen again Other sporadic. Anyway, note that the screen does not stutter and is not suitable for gaming or watching videos; It’s more of a workaround here.

Author’s comment: For example, you can also use your laptop on your Smart TV or similar…
Windows 11 Windows11 #Win11 #Win11 #Windows11 Guide Tips Tricks Help Help.


More Stories
Ubisoft wants to release a new Assassin's Creed game every 6 months!
A horror game from former developers at Rockstar
Turtle Beach offers the Stealth Pivot Controller for PC and Xbox